Proxy bundle sharing is how footage reaches SudoCut without moving the original files. You upload a zipped Final Cut Pro library that carries proxy media, SudoCut makes the first cut on the proxies, and the editor downloads the project and the bundle to finish the edit.
Upload the bundle
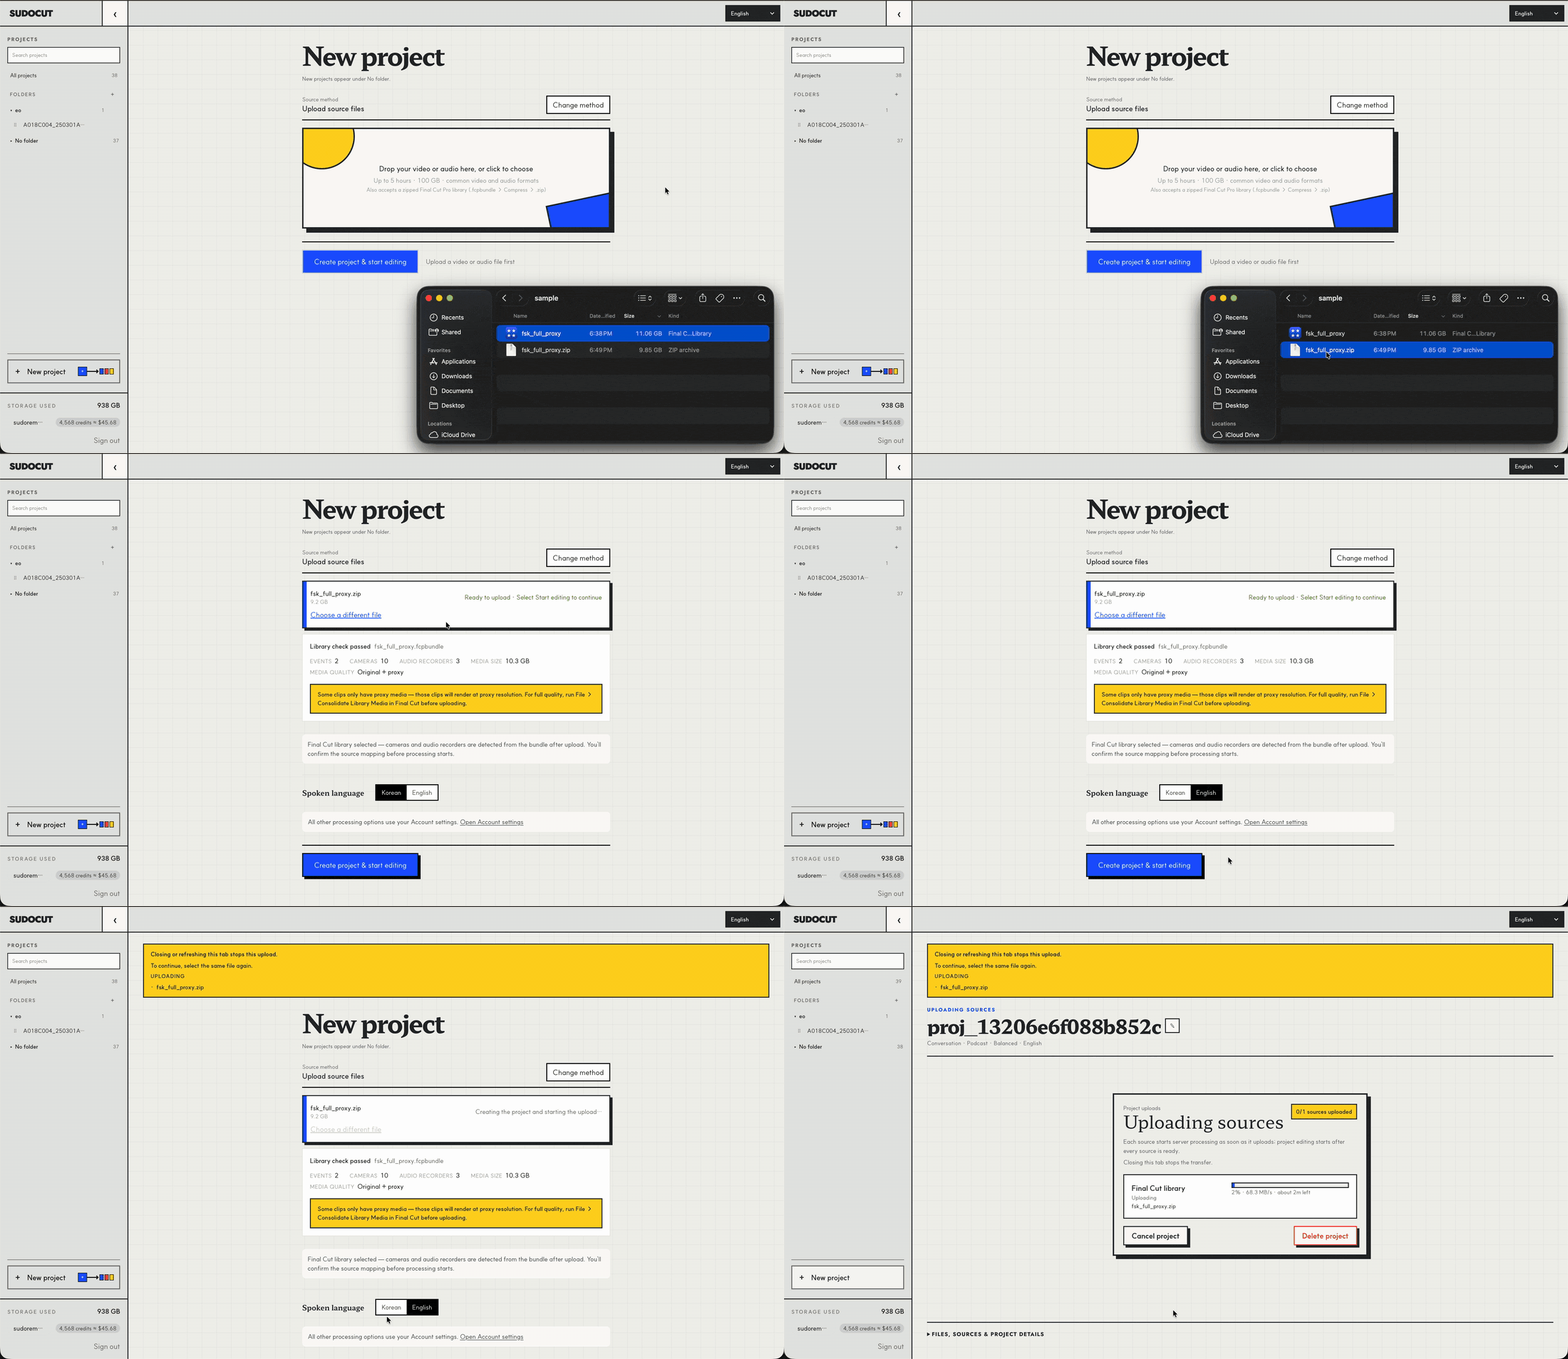
- In Final Cut Pro, generate proxy media for the event you are sending.
- In Finder, right-click the library (
.fcpbundle) and choose Compress. SudoCut accepts the library only as a.zip. - Go to New project → Upload source files and drop the
.zipin. - Limits on the upload card: up to 5 hours, 100 GB, common video and audio formats.
After the upload, the server unpacks and scans the bundle. When the scan is done, the confirm screen opens. Nothing runs or spends credits yet.
Confirm the sources
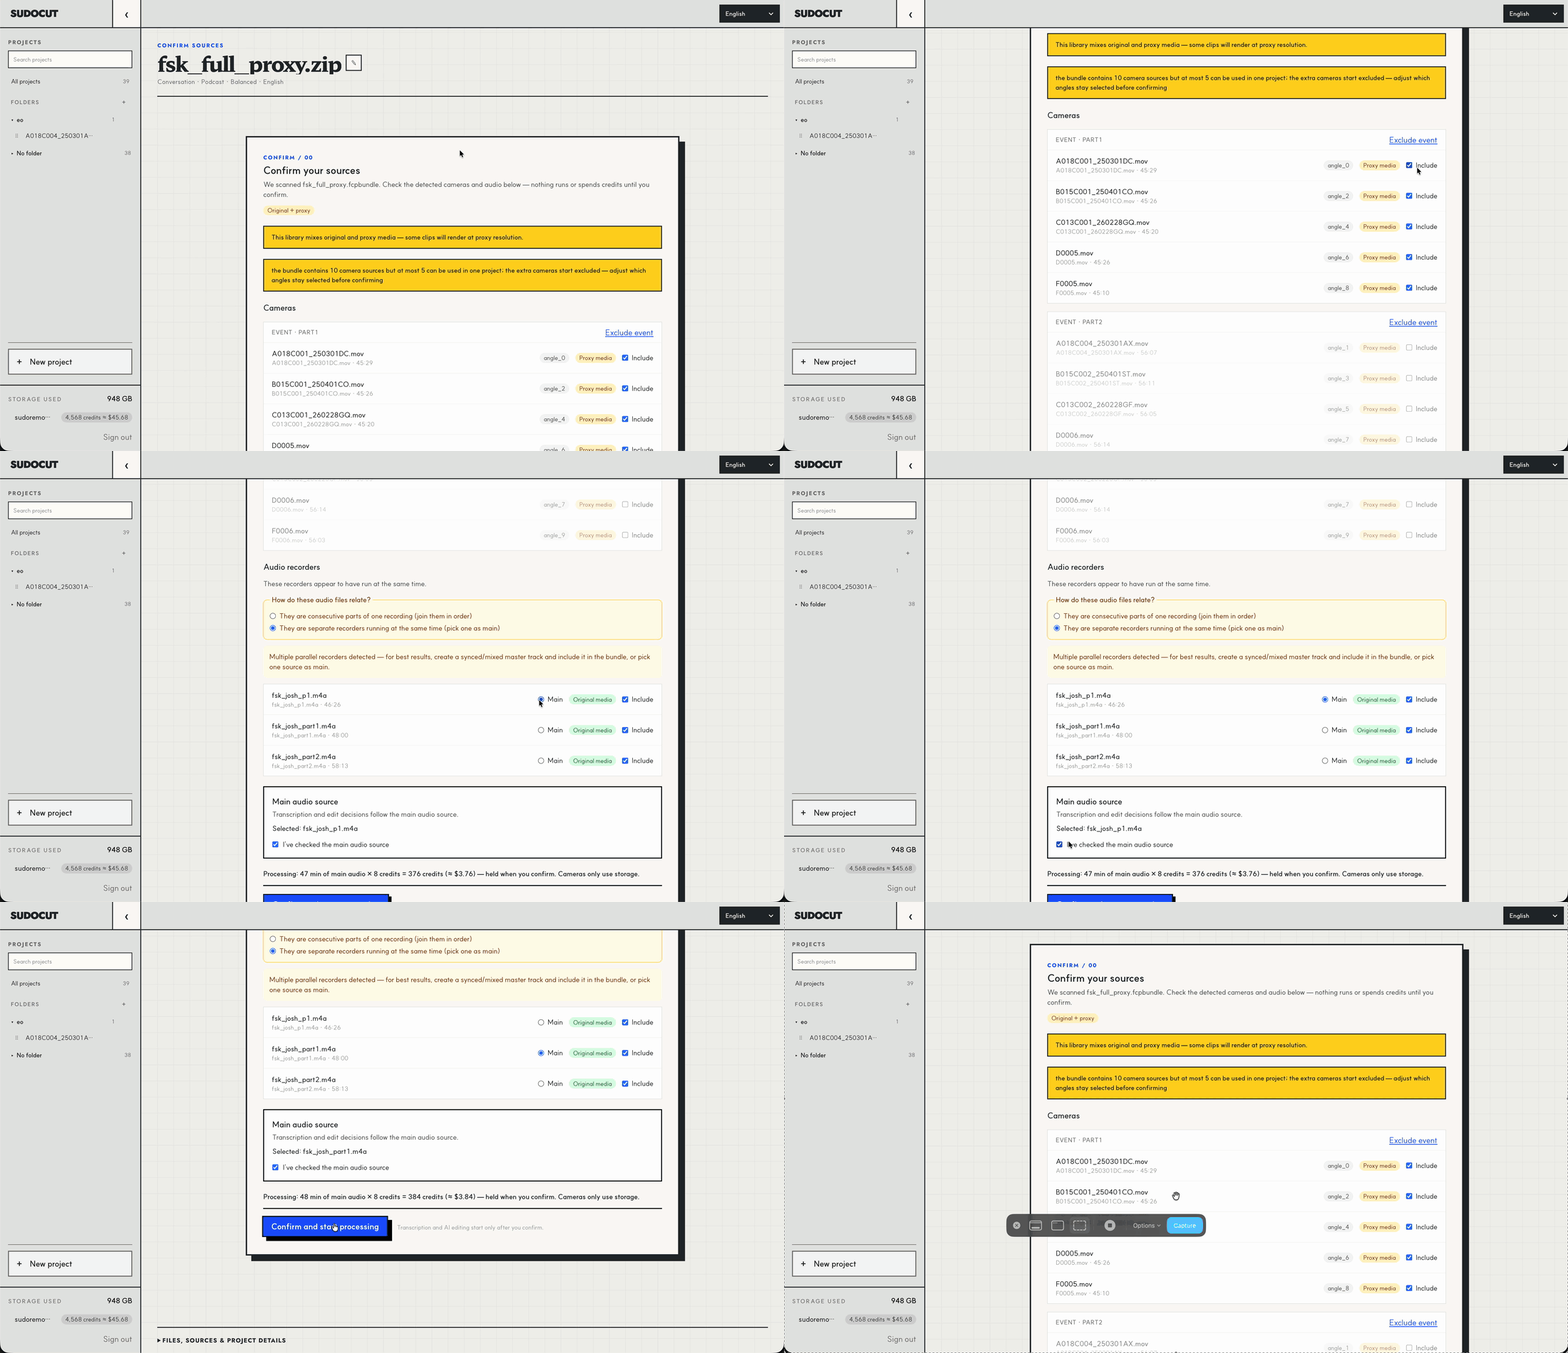
Check three things, top to bottom:
- Cameras — every camera found in the bundle. Include or exclude each one. At most 5 cameras can be used in one project; extras start excluded.
- Audio recorders — say how the audio files relate: consecutive parts of one recording, or separate recorders that ran at the same time.
- Main audio source — the most important choice on this screen. Transcription and every edit decision follow the main audio. Pick it, then tick "I've checked the main audio source."
The line at the bottom shows the credit cost before anything runs. Confirm to start processing.
What a correct bundle looks like
If the scan reports problems, compare your bundle against this one.
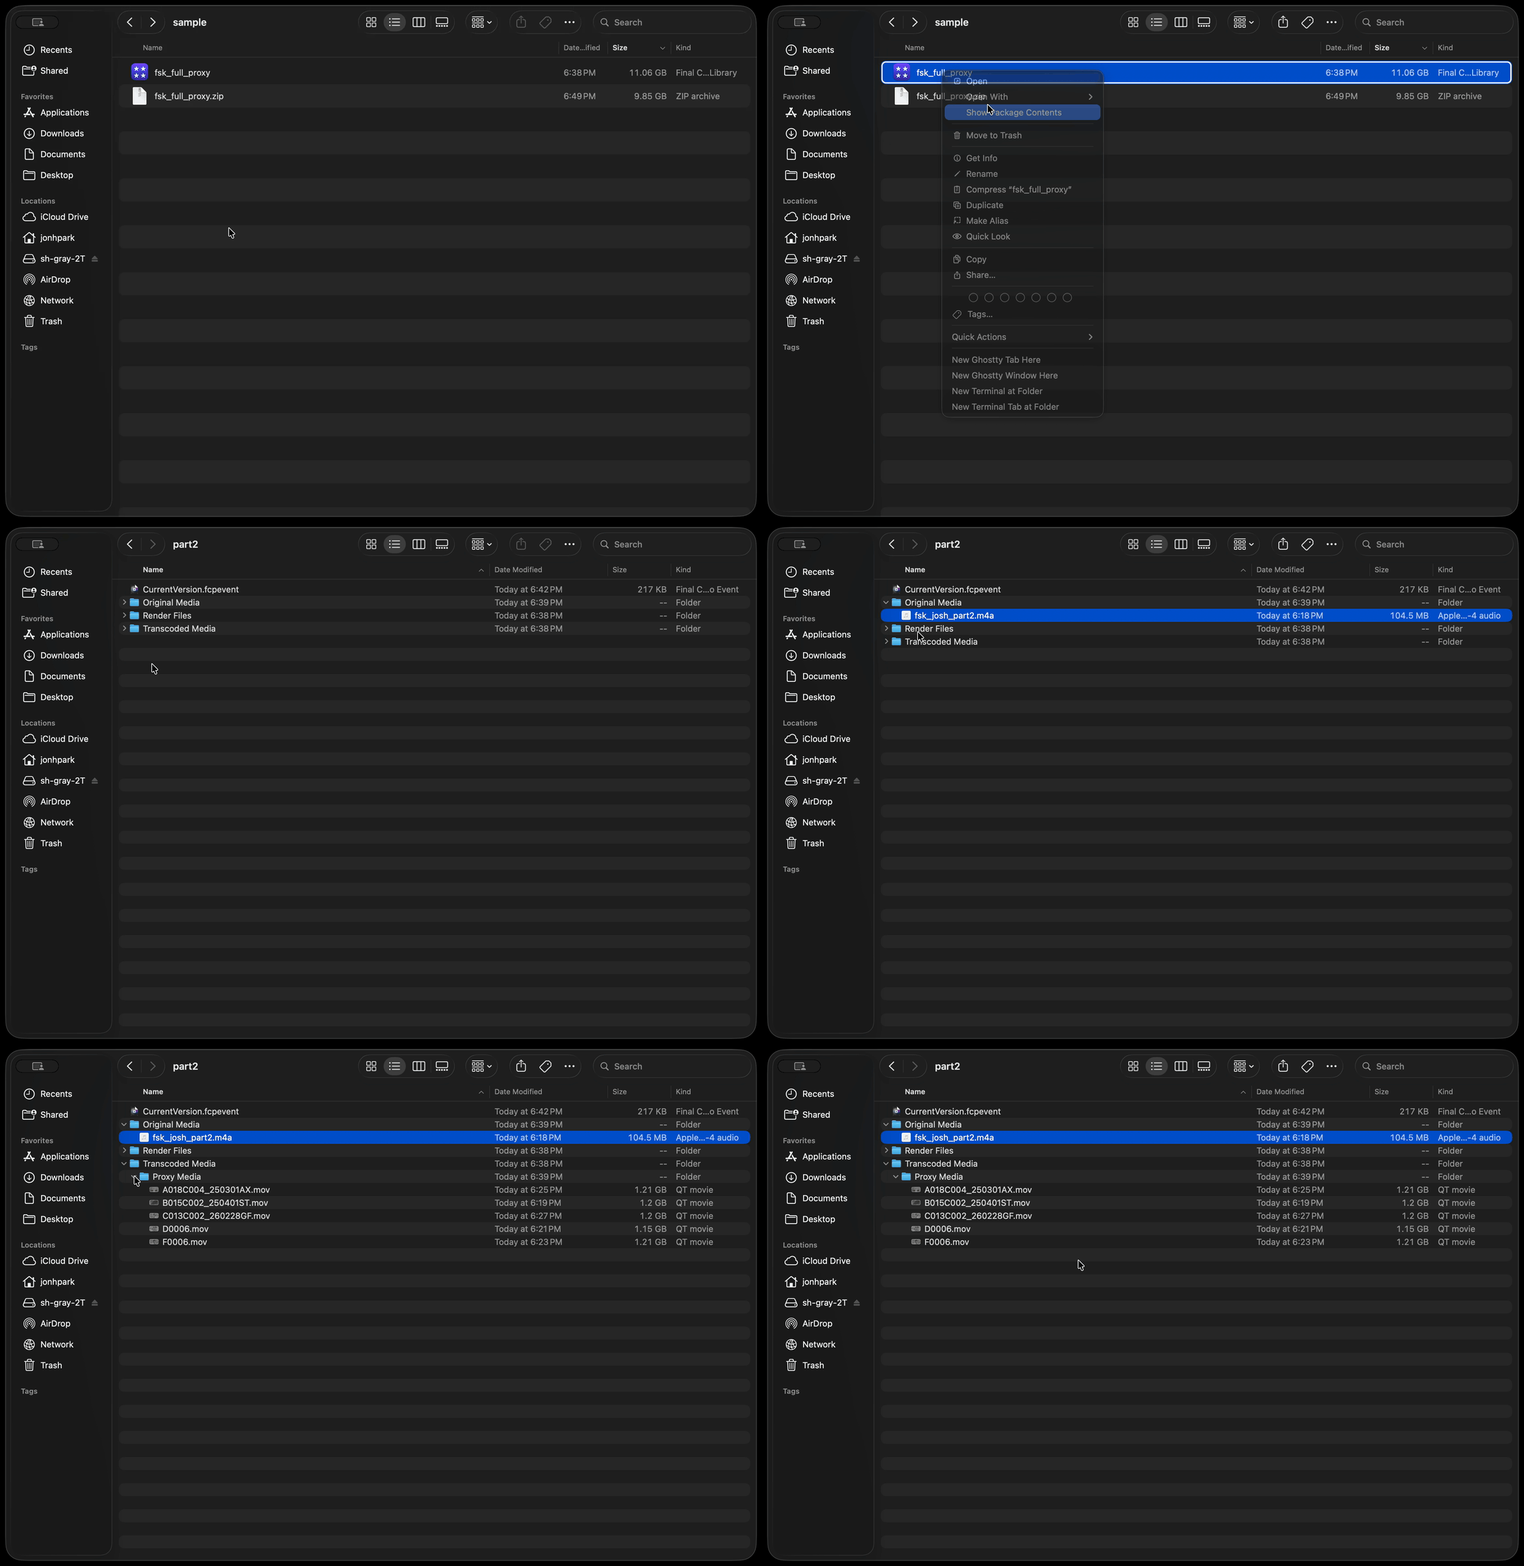
- The bundle is proxy media — made for lightweight editing and sharing. Original video never leaves your disk.
- Proxy Media/ holds one proxy
.movper camera. This is what SudoCut edits on. - Audio sits in Original Media/, not in Proxy Media. Final Cut Pro does not transcode audio — it is light enough to travel as the original files.
Common mistakes
- No real video or audio in the bundle. Proxy video is lightweight, but the files must actually be inside the bundle — video and audio both.
- Link files instead of media. If the library points at files that live outside it, the zip contains only small pointer files. A link cannot be edited — there is nothing to cut. Check inside the bundle: proxy videos are large (the example above shows ~1.2 GB per camera). A file of a few kilobytes is a link, not a source.
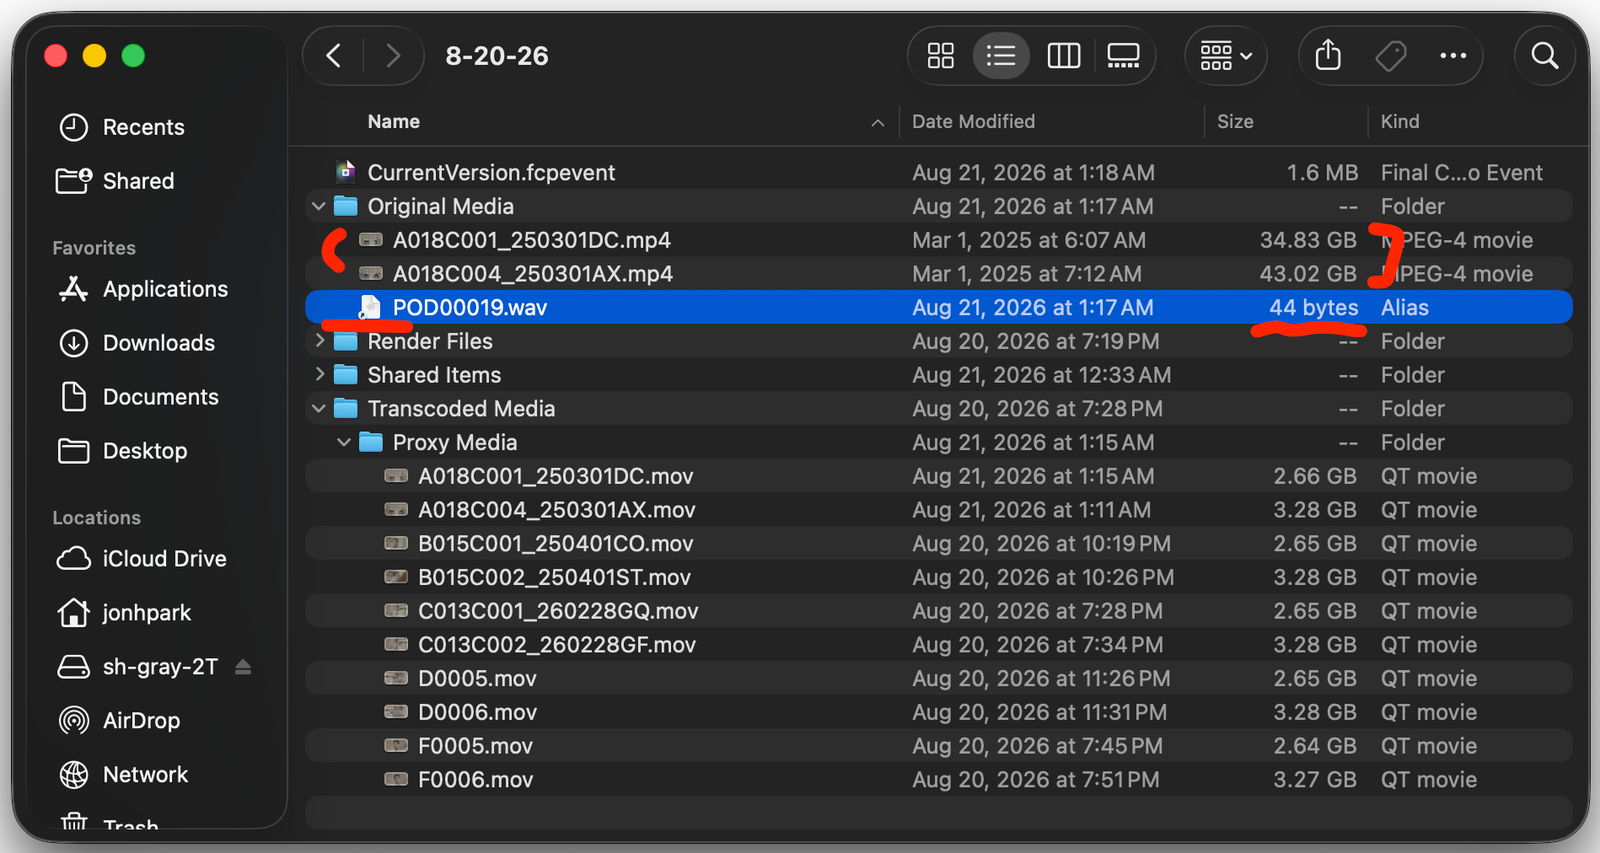
Both mistakes in one bundle: Original Media carries two full original videos
(34.83 GB and 43.02 GB), and POD00019.wav is a 44-byte alias — a link,
not audio we can edit.
Set the camera rules
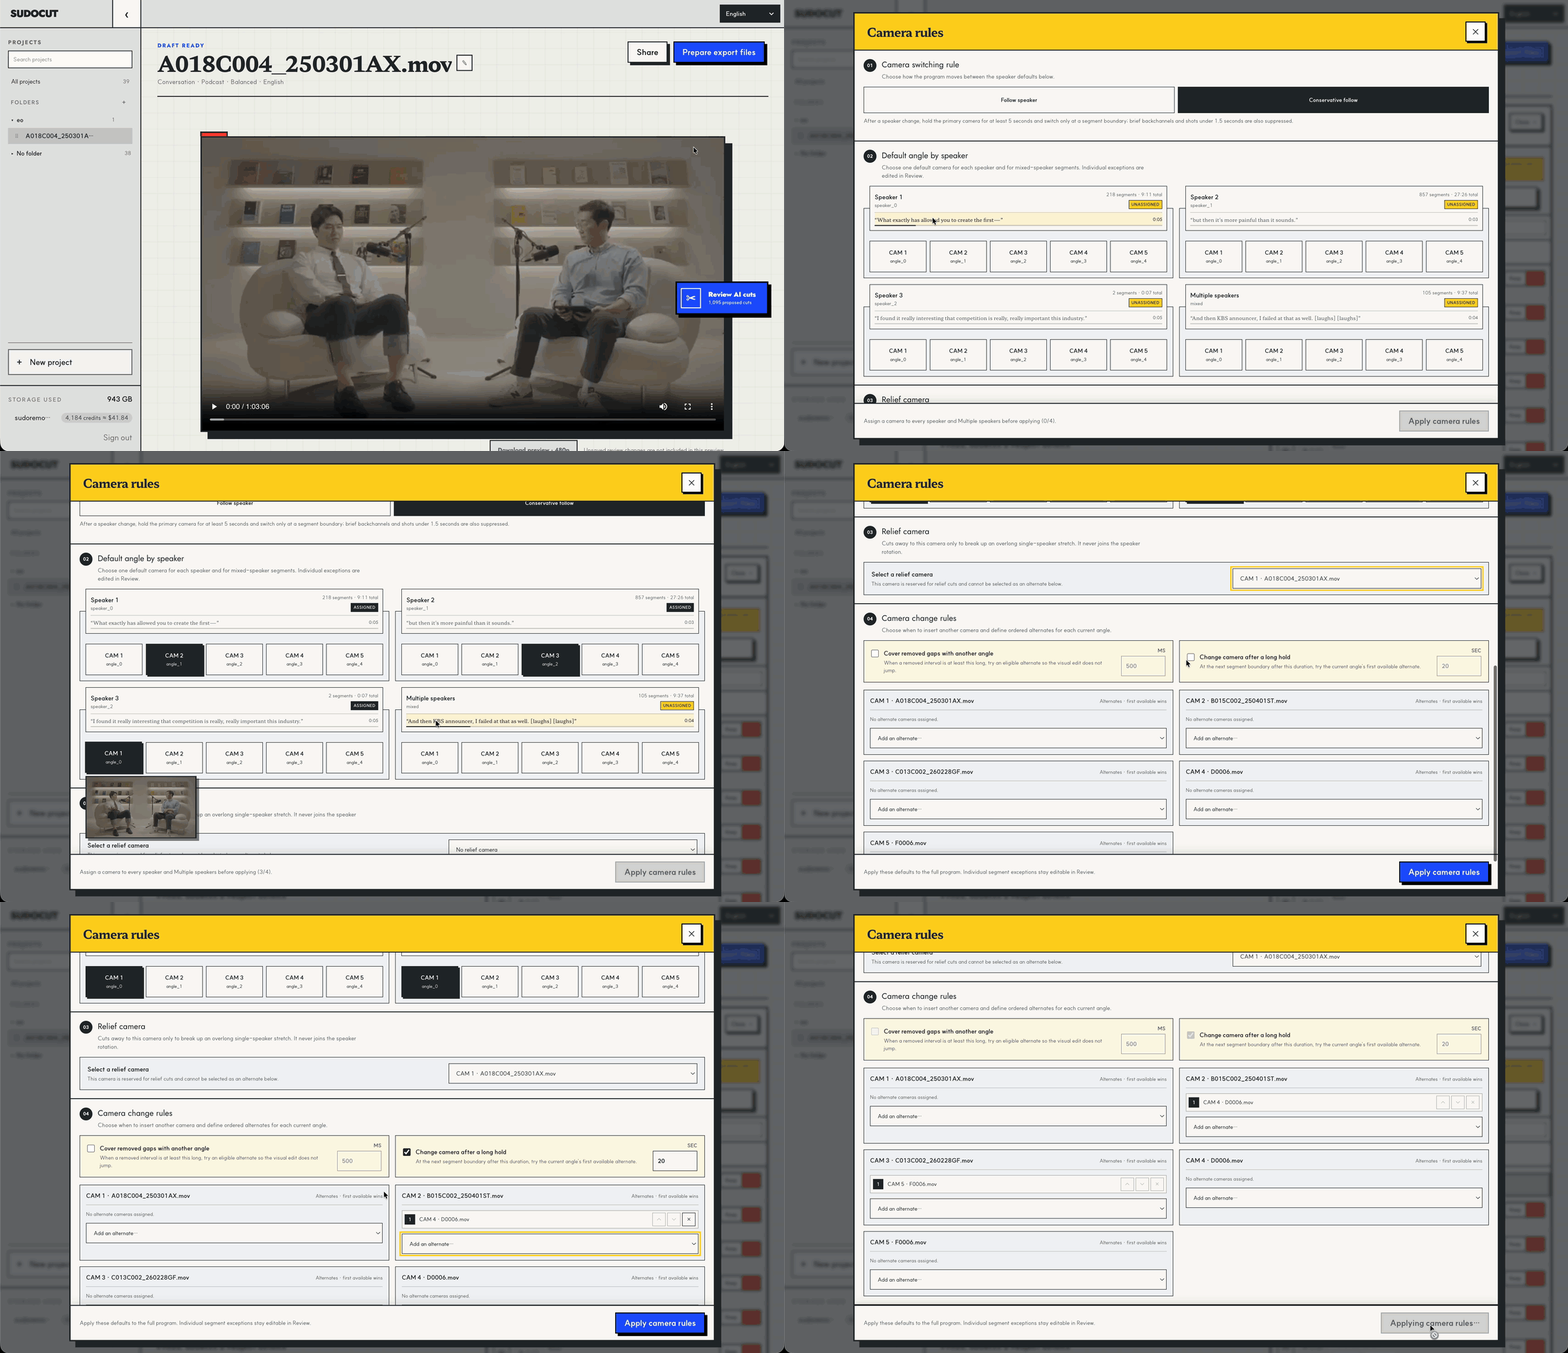
- Assign a default camera to each speaker, and one for mixed-speaker segments.
- Pick the switching behavior. Change camera after a long hold switches the angle when one speaker talks for a long stretch, to keep tension.
- Apply the camera rules. They set the whole program; single segments can still be changed by hand in review.
Export
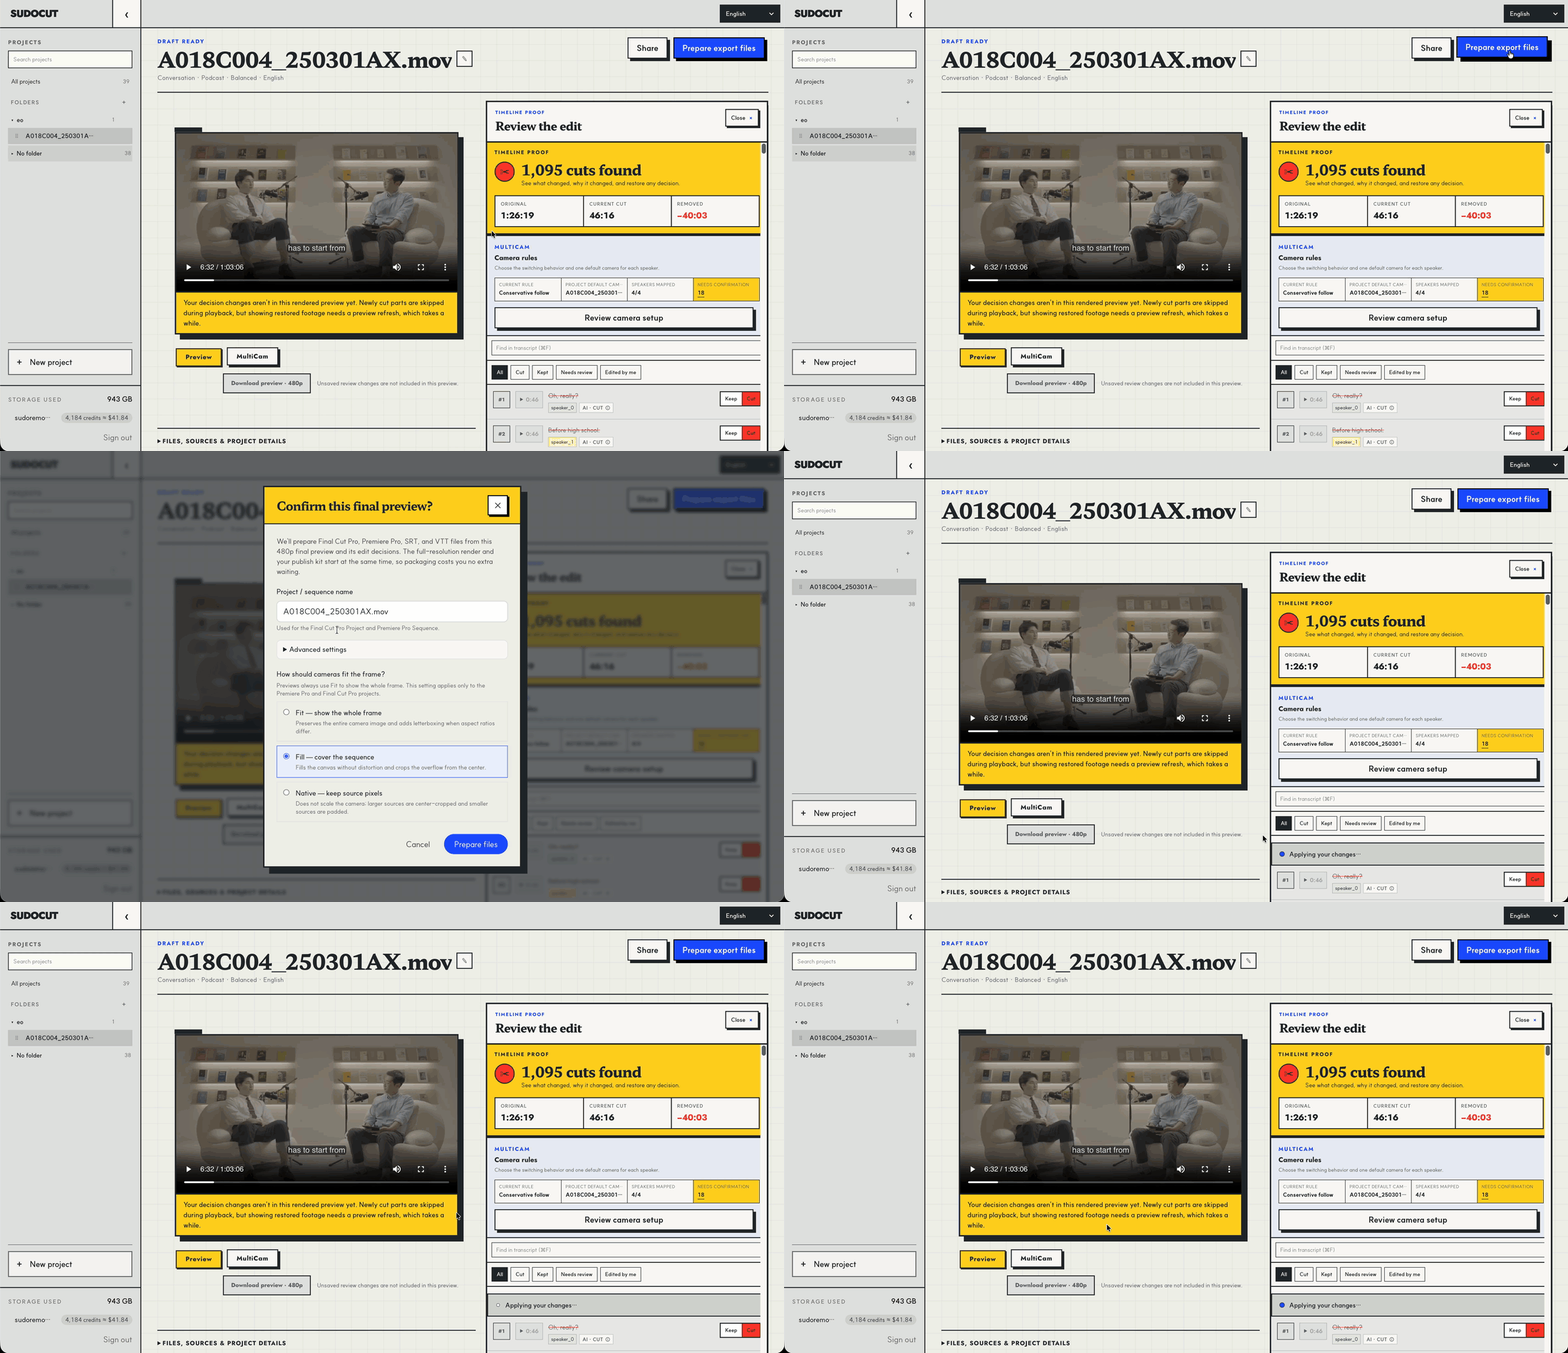
- When the draft is ready, press Prepare export files and confirm the final preview.
- Export builds the project files from the edit decisions — the Final Cut Pro
project (
.fcpxml) and the Premiere Pro project — plus subtitles and the final video.
Download the edit
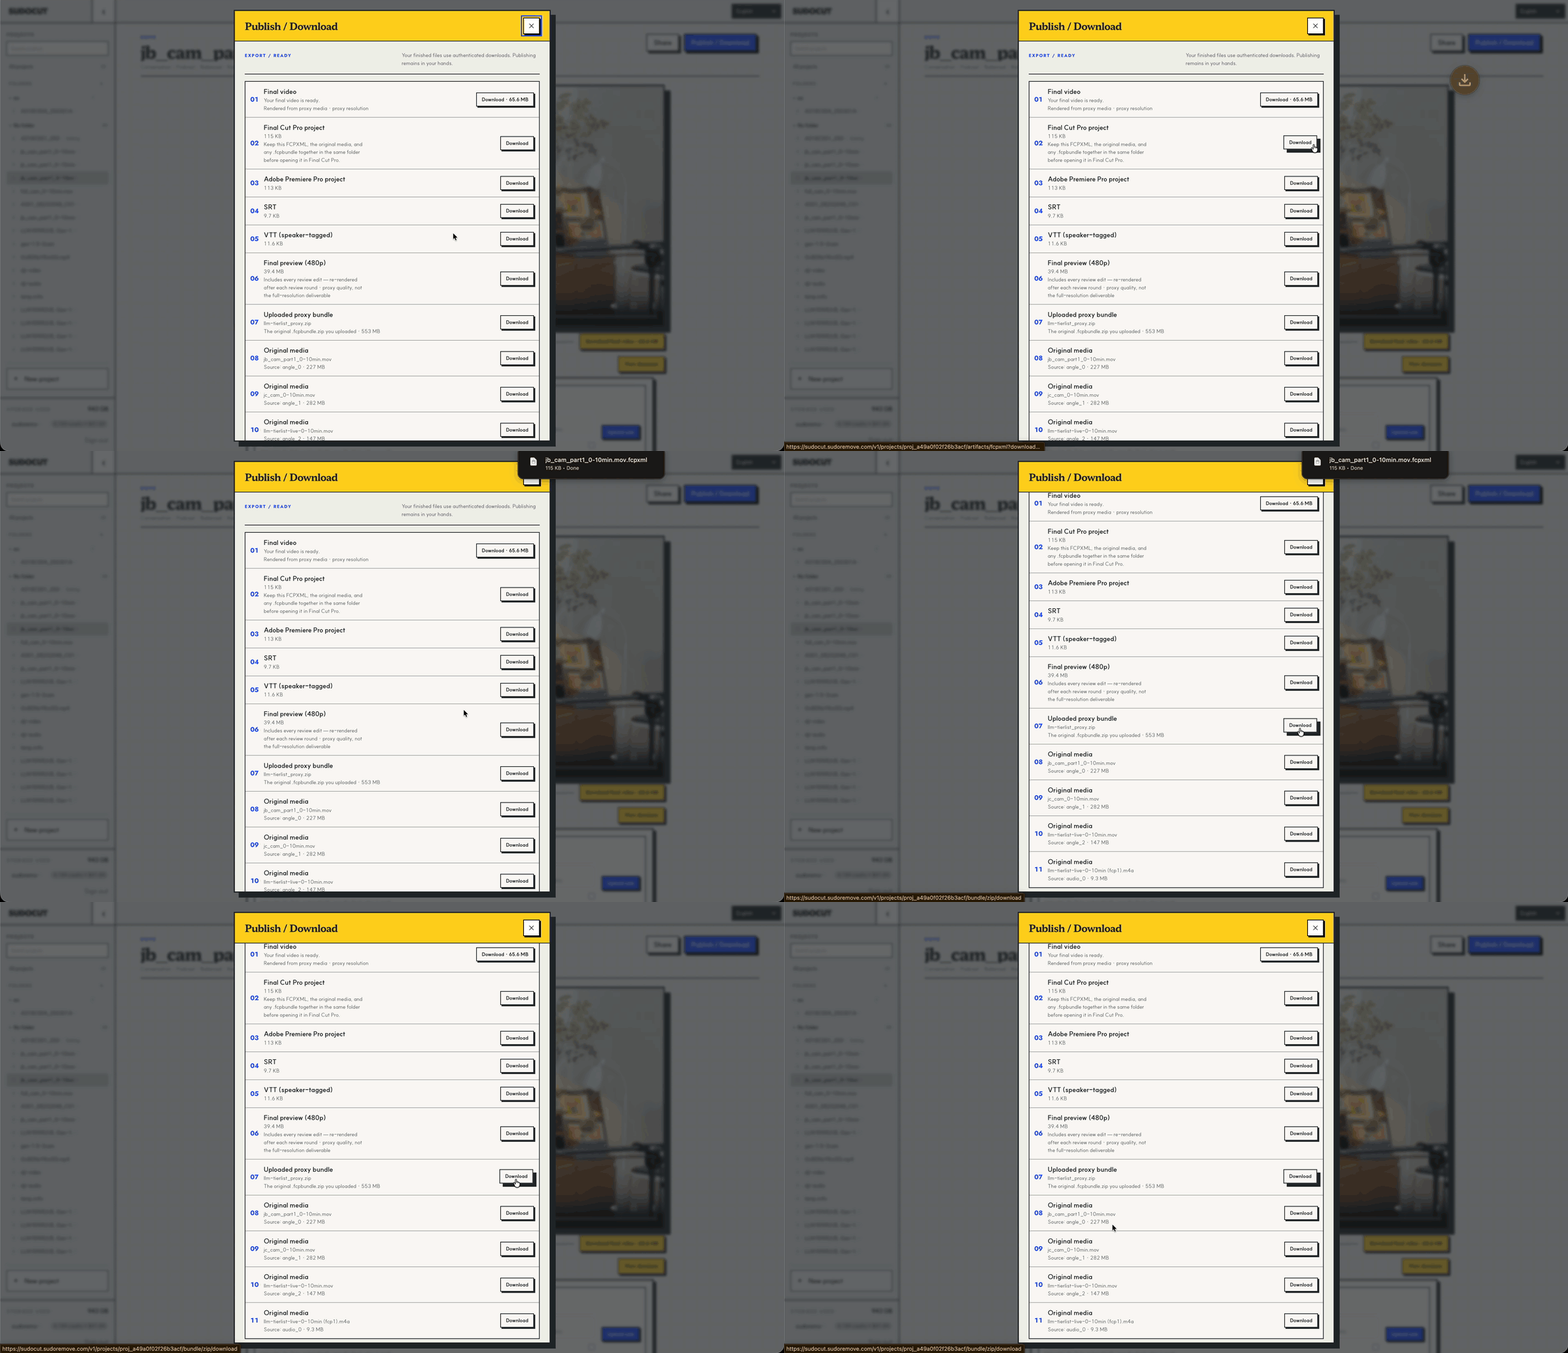
Publish / Download lists everything. For this flow you need two of them:
- Final Cut Pro project (
.fcpxml) — the edit itself, every cut on the timeline. Keep it in the same folder as the bundle before opening it. - Uploaded proxy bundle (
.zip) — the same bundle that was uploaded, so an editor who never had the original sources can still open the project.
Also there: the final video (rendered from the proxies), an Adobe Premiere Pro project, SRT and speaker-tagged VTT subtitles, a 480p preview, and the original media files.
Finish in Final Cut Pro
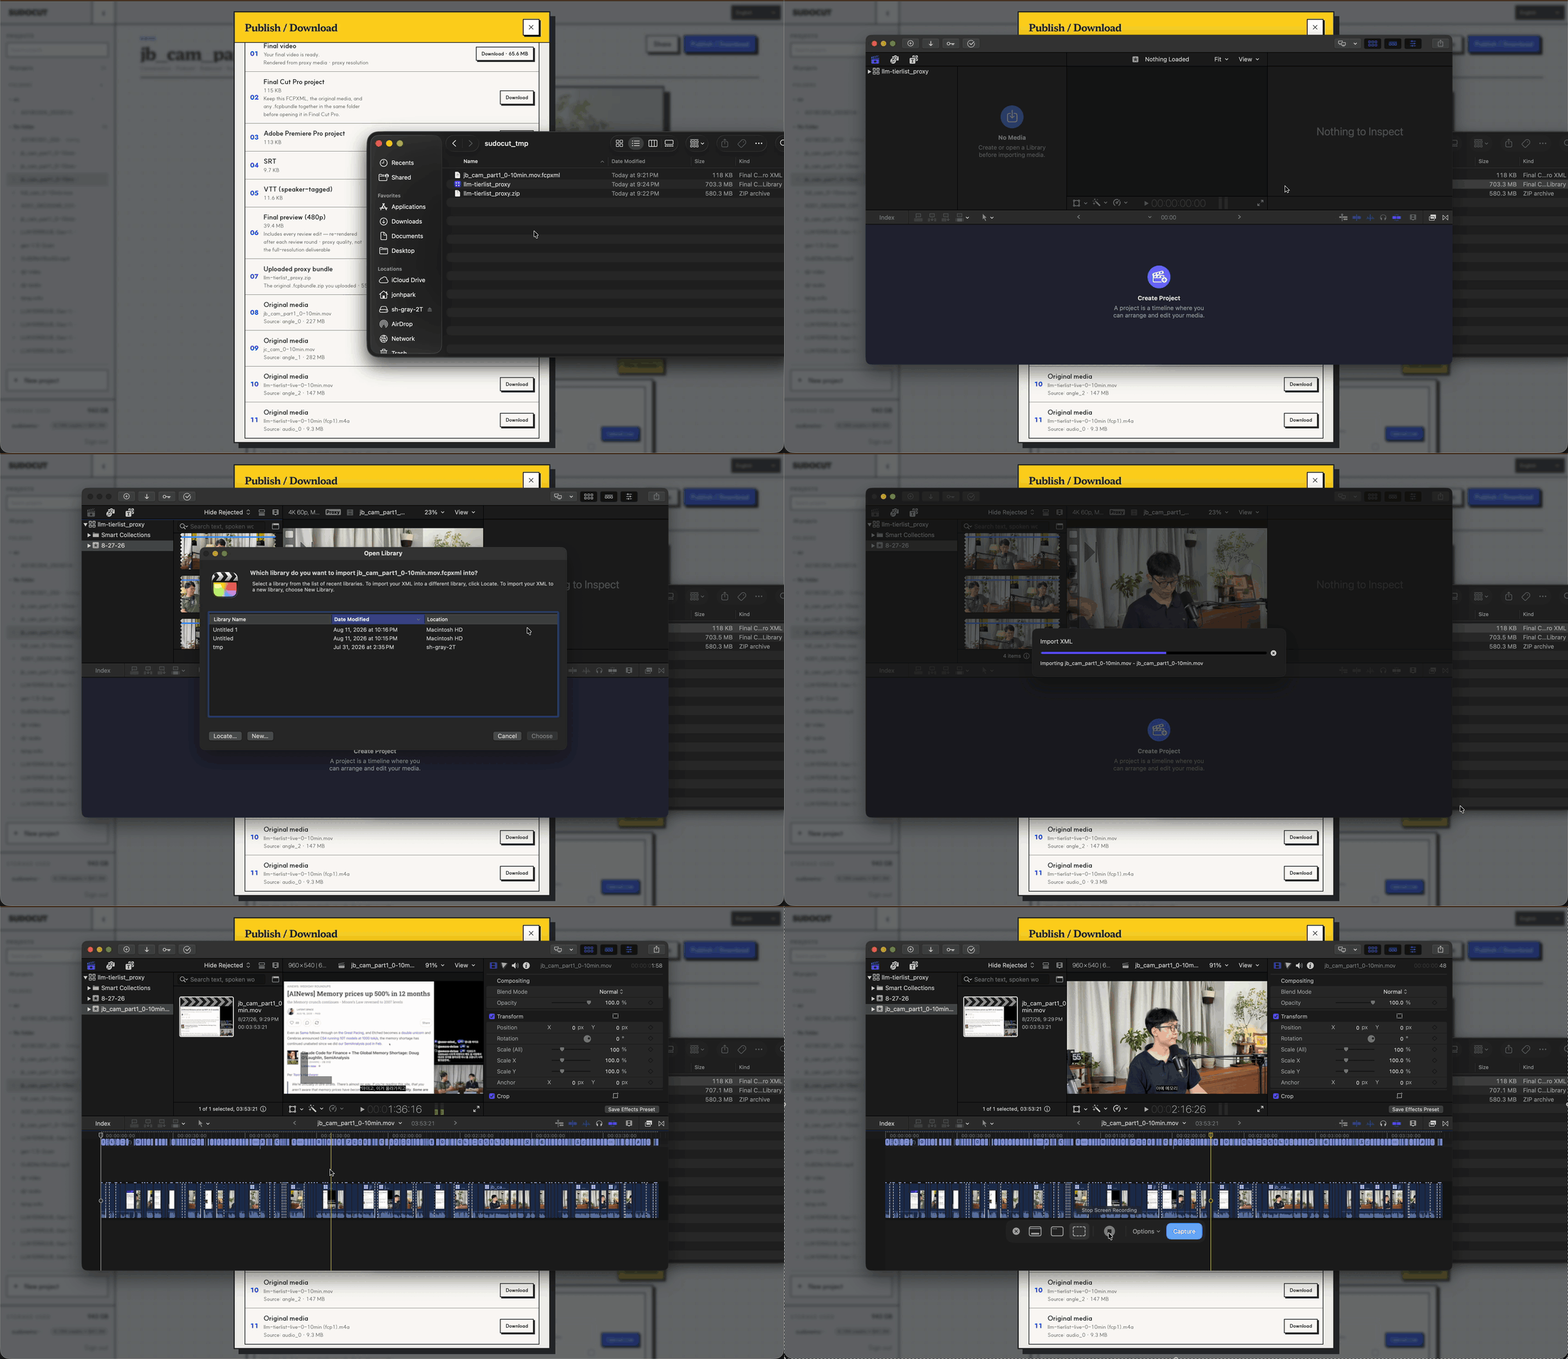
- Put the
.fcpxmland the bundle in the same folder, and unzip the bundle. - Open the
.fcpxmlin Final Cut Pro and choose the library to import it into. - If any media shows as missing, relink it — the files are in the proxy bundle.
- The AI's cuts are ordinary edits on the timeline — inspect any of them, put any of them back.
- Finish the edit as usual.
Appendix
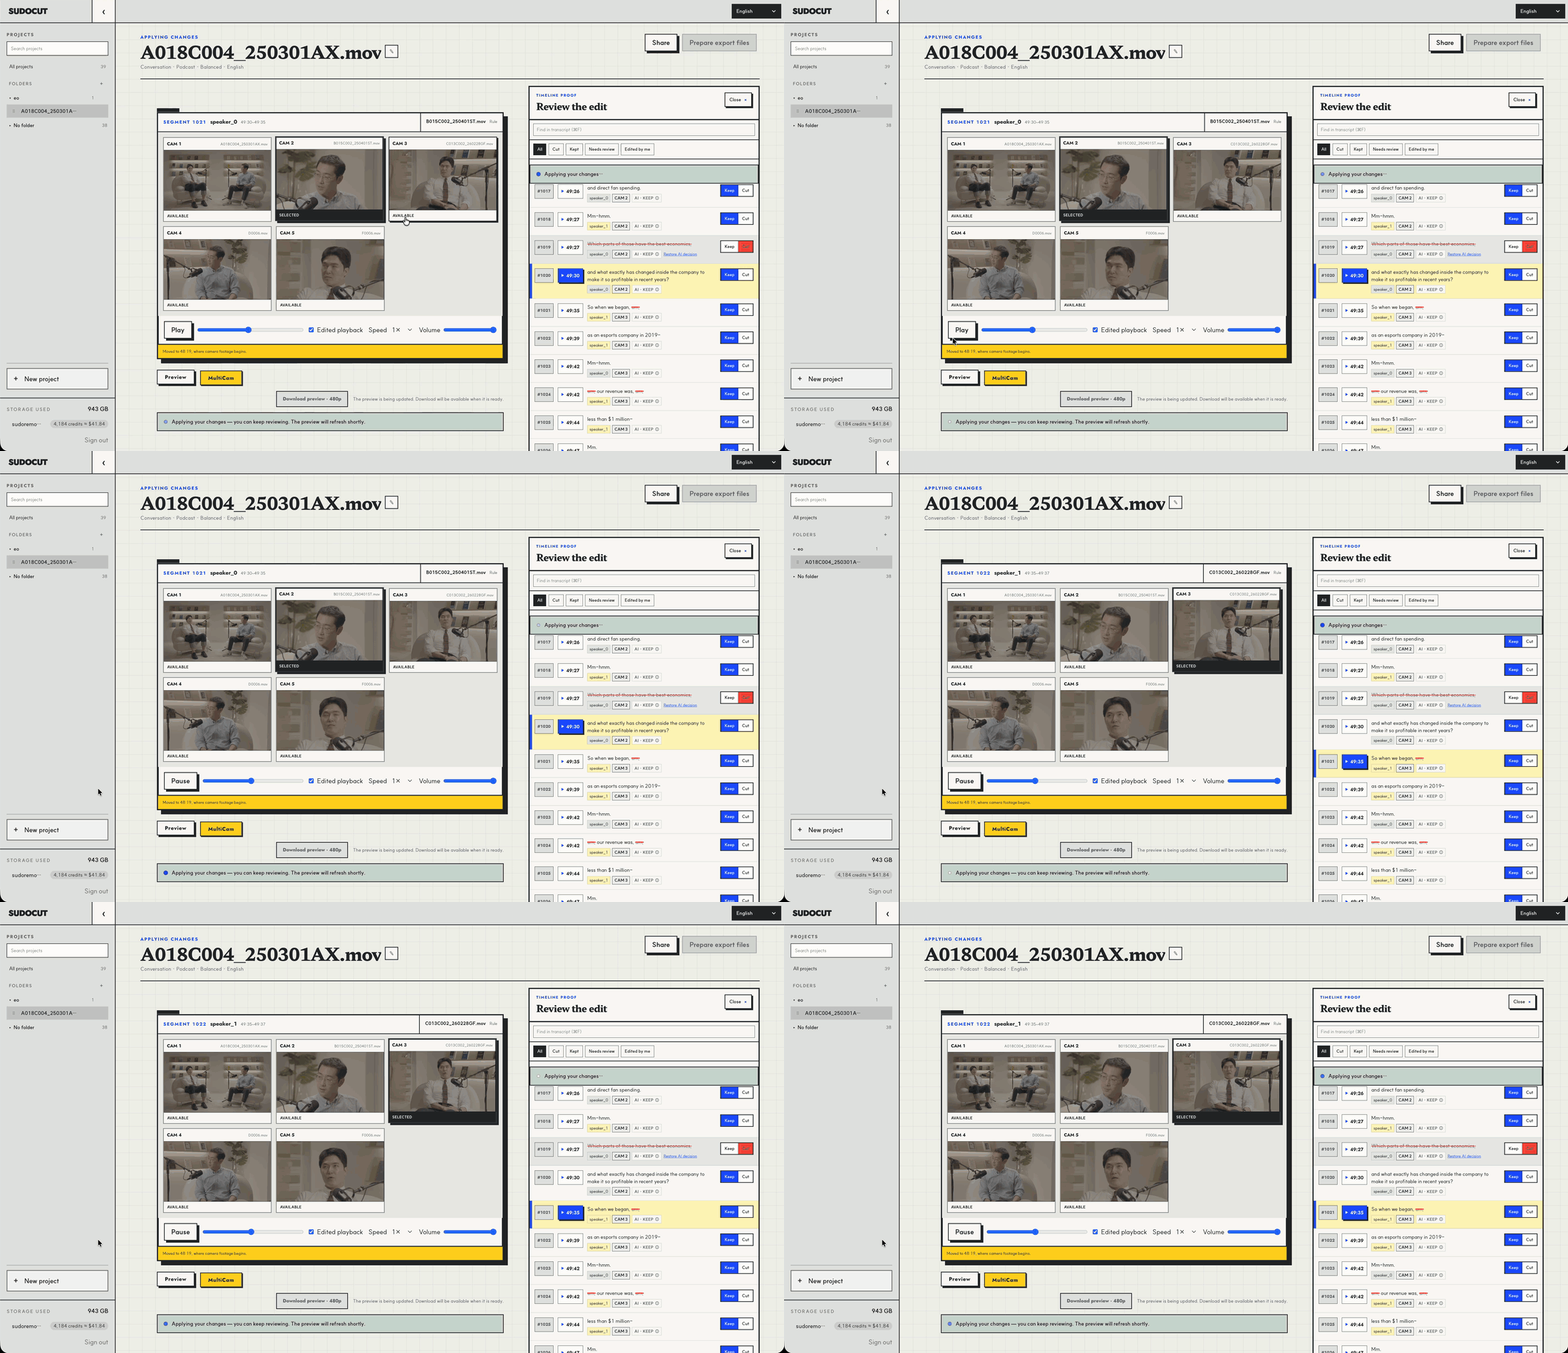
You can also review the multicam here and change the camera for a segment.
Something missing? Email support@sudo-cut.com.